What Healthcheck are and how to configure them
Healthchecks keep your site or application available for all users if one or more servers go down. This feature monitors the availability of your website or servers and excludes non-working IPs from DNS responses in case of issues. As a result, traffic is redirected from the problematic server to a working one, and your resource stays available for all users.
This feature is especially important for business areas where the loss of availability means the loss of customers. Imagine that you own an online store that works in Europe and the US. Your site is available on two servers: a European one and an American one. You use Geobalancing to route people from all over the world to the closest server so that the site loads faster. Customers from Paris, France, and Barcelona, Spain, are balanced to the European server, while users from Vancouver, Canada, and Chicago, US, are balanced to the American one.

Imagine the European server crashes. Users who were being balanced to the European server get an error instead of your site. While the server is being fixed, customers go to a competitor’s site to make purchases faster.

If you enable Healthchecks, the next time the European server crashes, Healthchecks will tell the DNS server not to add the unavailable European server IP in DNS responses. All requests from your customers will be directed to the American server, so your web application will still be working. Customers will be able to make purchases without even noticing that anything happened.

When your European server recovers, Healthchecks will detect that and return its IP in the DNS responses for users in Europe.
How do Healthchecks work?
This section includes a basic and advanced explanation of how the Healthchecks feature works.
Basic explanation:
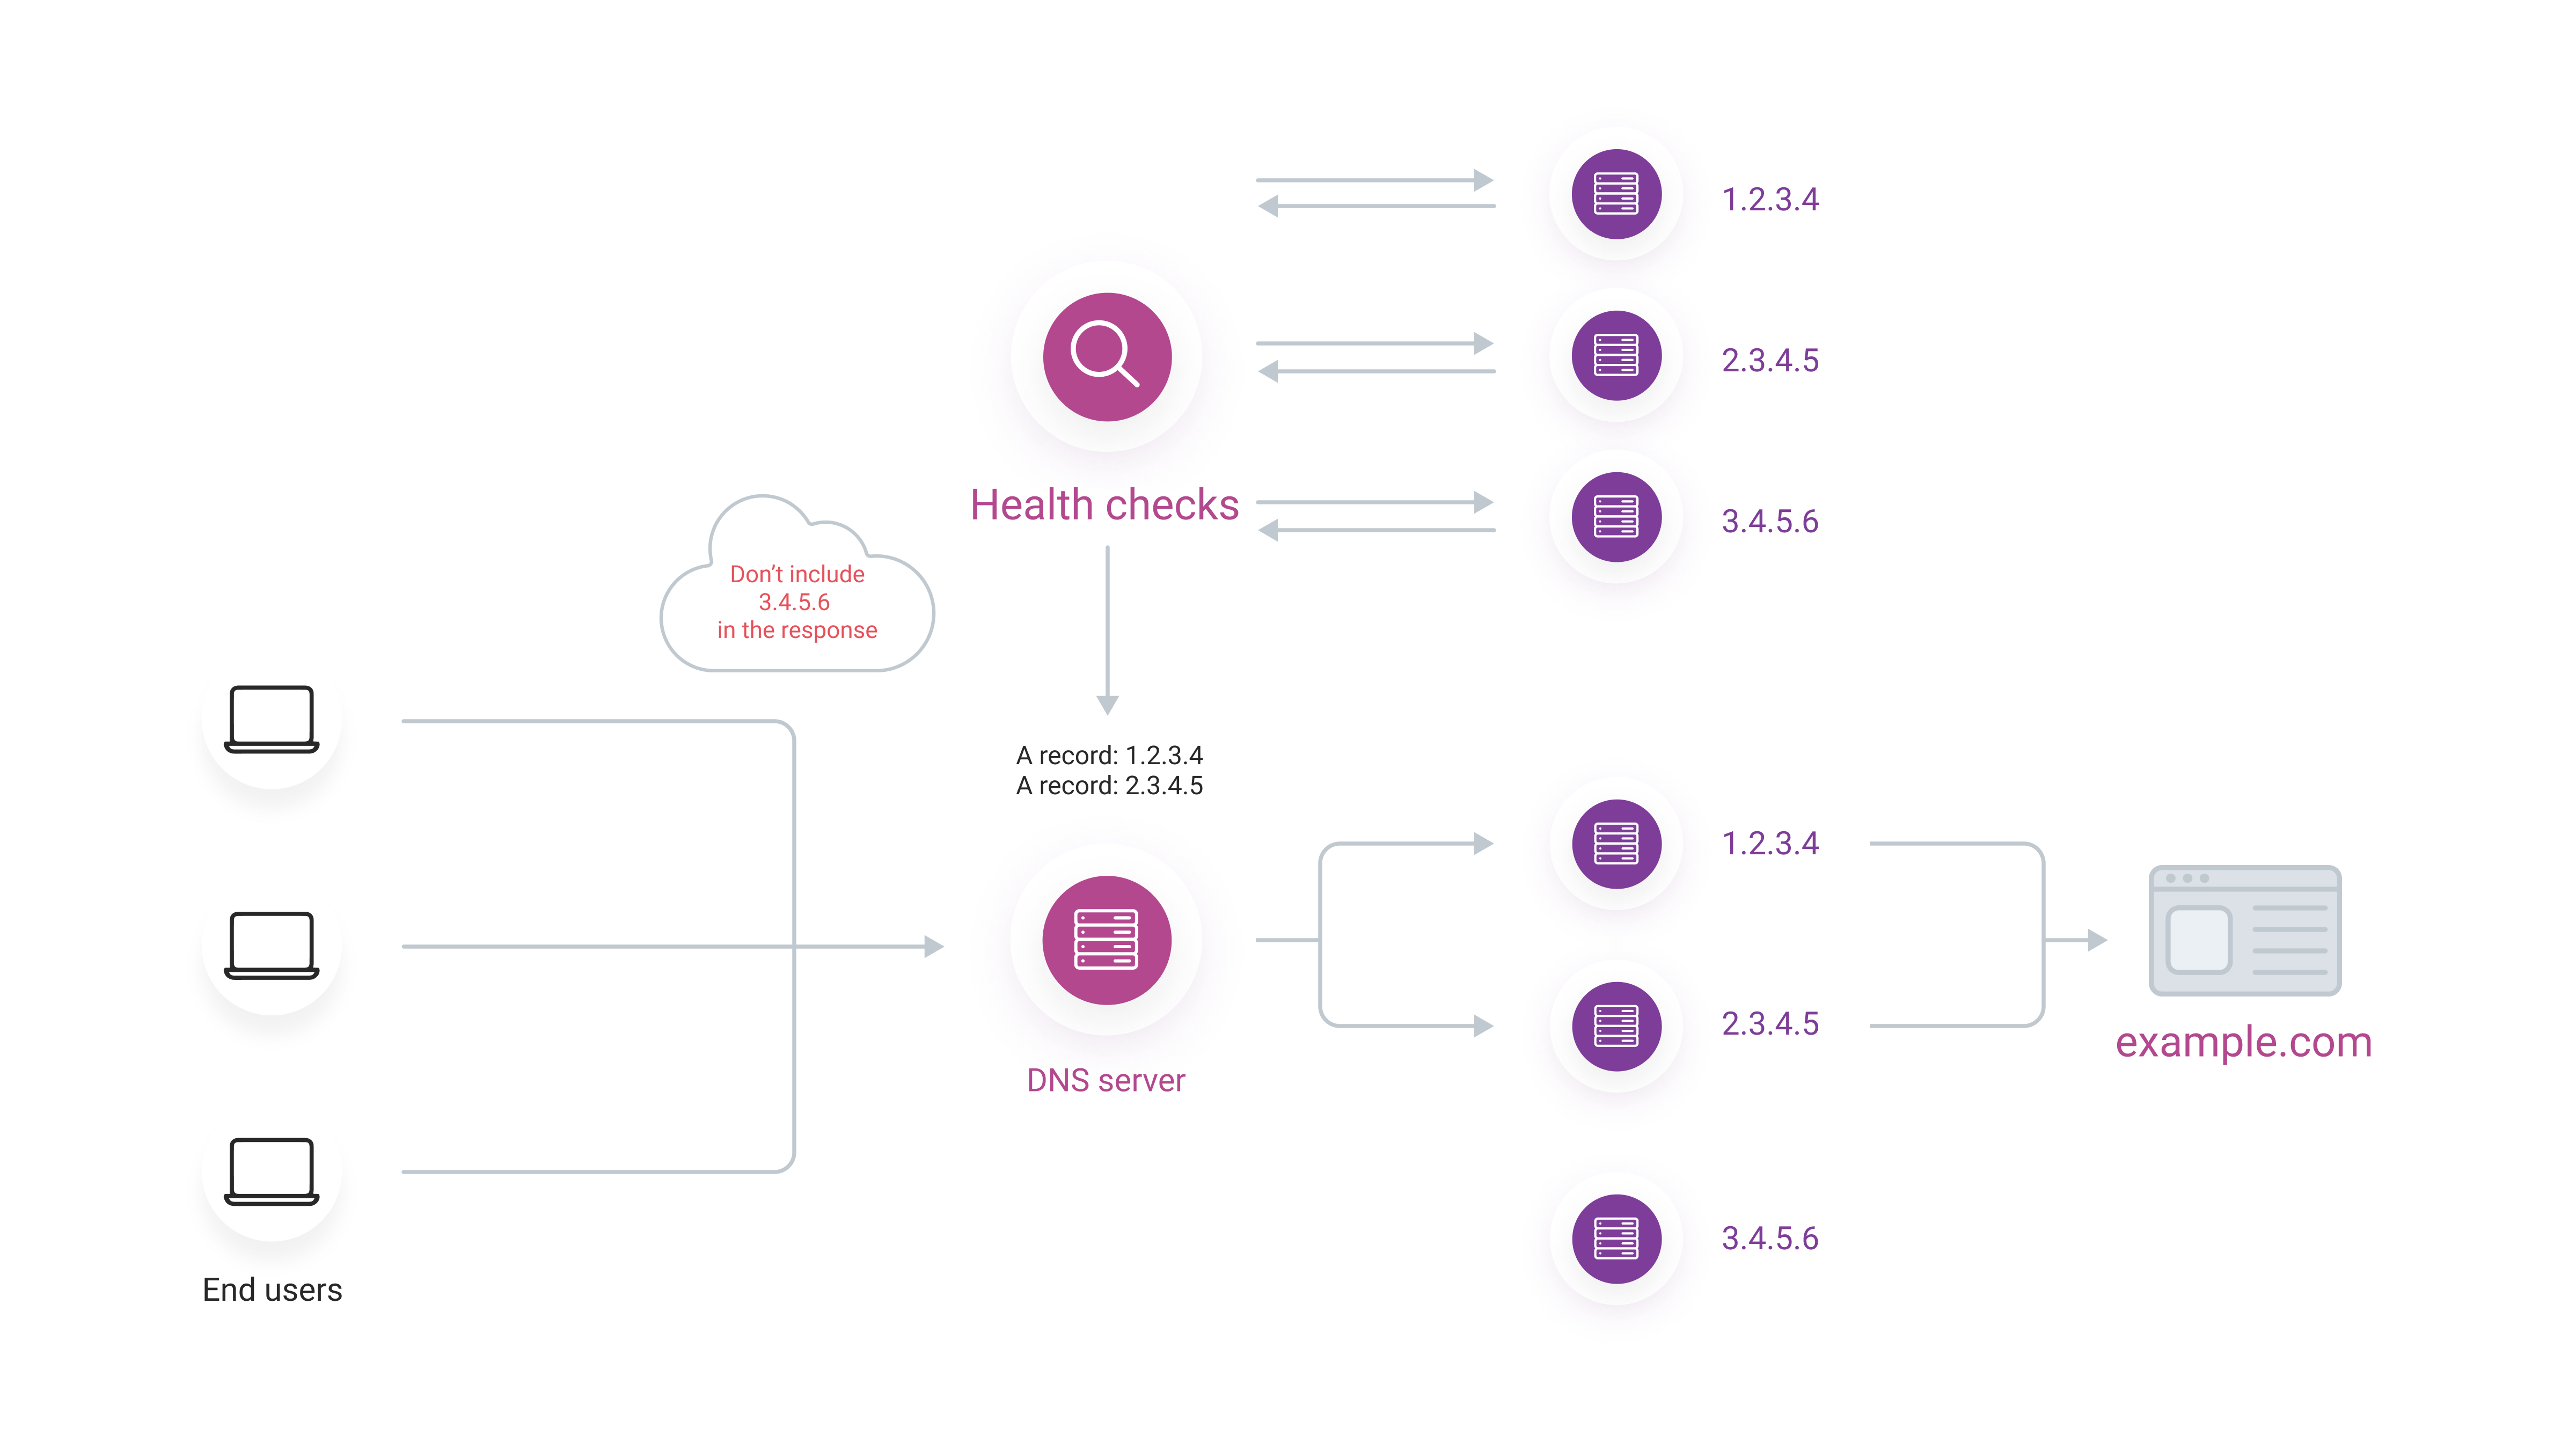
Healthchecks send regular requests to configured addresses to determine whether they are available. If a server doesn’t respond, DNS Healthchecks tells DNS servers to exclude its IP from DNS responses. When the server recovers, DNS Healthchecks sends DNS the command to return its IP to DNS responses.
By default, DNS Healthchecks uses round-robin load balancing to distribute users’ requests across available web servers. However, you can enable Geobalancing during configuration.
Detailed explanation:
1. DNS Healthchecks sends requests to servers to check their availability. You configure request settings (protocol, frequency, and others) in the Gcore Customer Portal after the feature is enabled.
For example, you can set the configuration for Healthchecks requests as follows:
- Protocol: ICMP
- Frequency: 1 minute
- Timeout: 10 seconds
DNS Healthchecks will send requests to web servers via ICMP protocol every 60 seconds.
2. Requests are sent from all Gcore DNS server locations. If your web servers send responses to Healthchecks within the set timeout (e.g., 10 seconds) in 85% of locations, the feature will mark them as available. If a web server doesn’t send a response to Healthchecks within the set timeout in 20% of locations, the feature will mark them as unavailable.
3. If a web server is unavailable, Healthchecks will mark the corresponding record as unavailable, and the DNS server will exclude it from responses.
If all Healthchecks fail, their A records will be included in the DNS response, while stoll adhering to other filters like geo county or first_n.
4. The DNS server removes the A record of the unavailable server from its responses. Any requests intended for the unavailable server are redirected to other available servers.
The load balancing mechanism decides which server will respond to requests originally meant for the unavailable server. By default, DNS Healthchecks use round-robin, but you can configure your own mechanism, such as geobalancing. You can find the configuration for this mechanism in the article Dynamic response.
5. Healthchecks keep sending requests to web servers. When the web server becomes available and responds, the feature will send the appropriate update to the DNS server. After that, the web server goes back online for end-users.


Configure Healthchecks
1. Navigate to the DNS section in the Gcore Customer Portal.
2. Click the domain name of the DNS zone where you intend to set up Healthchecks.

A new page will open.
3. Ensure that the advanced interface mode is enabled. In non-advanced mode, the Healthchecks feature isn't available.
A Healthcheck picker can be applied only to records of the A, AAAA, or CNAME type.
4. Click three-dot icon and click Edit record in the row of the A, AAAA, or CNAME record.

The “Records list/Edit record set” page will open. Perform the remaining steps there.

5. Enable the Dynamic response toggle.
6. Click a Healthcheck picker in the right list.
7. Click the edit icon when the picker is added to the left column.
A pop-up will open. Complete the remaining the steps there. The settings will differ depending on the protocol: TCP/UDP, ICMP, or HTTP. Choose the relevant section below to complete configuration.
TCP/UDP

8. Under "Protocol", select TCP or UDP.
9. In the "Port" field, specify the connection port (e.g., 80 or 443).
10. In the "Check Frequency" field, select the interval of checks from the list.
11. In the "Timeout" field, set the time within which your web servers should give the response before being considered down.
12. (Optional) In the "Command" field, enter the text that will be sent to the host of the site as plain text, e.g., GET / HTTP/1.1\n\n.
13. (Optional) In the "Expected content regexp" field, enter a regular expression that matches the response body or leave it blank.
14. Click Save.
ICMP

8. Under "Protocol", select ICMP.
9. In the "Check Frequency" field, select the interval of checks from the list.
10. In the "Timeout" field, set the time within which your web servers should give the response before being considered down.
11. Click Save.
HTTP

8. In the "Protocol" block, select HTTP.
9. In the "Port" field, specify the connection port (e.g., 80 or 443).
10. In the "Check Frequency" field, select the interval of checks from the list.
11. In the "Timeout" field, set the time within which your web servers should give the response before being considered down.
12. (Optional) In the "Host" field, specify a value of the Host header to be passed during HTTP request.
13. In the "Requested URL" field, enter the URL that will be requested for checks.
14. In the "Requested Method" block, select the method for checking requests; e.g., GET.
15. In the "Use TLS" block, choose whether TLS should be used.
16. In the "HTTP status code" field, put the expected HTTP response code or leave it blank if any response is ok.
17. (Optional) In the "Expected content regexp", enter a regular expression that matches the response body or leave it blank.
18. Click Save.
The configuration is complete!
Enable backup metadata
You can enable backup metadata for Healthchecks. In this case, records marked as backups will not participate in the response if at least one “healthy,” valid record exists. If all records not marked as backup are non-functional, the “healthy” backup records will appear in the response.
To configure backup metadata, select which record will be used as a backup (Record 1 in the example,) choose “backup” from the dropdown list, and enable the toggle.

By default, DNS Healthchecks use round-robin balancing. You can configure the logic that will be used to distribute requests among available servers when some of them are unavailable. Refer to our detailed guide for more information.
Check Healthchecks logs
Refresh your DNS cache renewal and Healthchecks will start to monitor your site’s availability.
You can also check for recent monitoring events in Healthchecks logs. Go to the page of the DNS zone for which you configured Healthchecks. Select the relevant record, click the three-dot icon on the right, and click Healthchecks logs.

Was this article helpful?
Not a Gcore user yet?
Learn more about our DNS hosting